1. 什么是微服务? 官网: https://www.martinfowler.com/articles/microservices.html
In short, the microservice architectural style is an approach to developing a single application as a suite of small services, each running in its own process and communicating with lightweight mechanisms, often an HTTP resource API. These services are built around business capabilities and independently deployable by fully automated deployment machinery. There is a bare minimum of centralized management of these services, which may be written in different programming languages and use different data storage technologies. —–[摘自官网]
1
2
3
4
5
- a suite of small services --一系列微小服务- running in its own process --运行在自己的进程里- built around business capabilities --围绕自己的业务开发- independently deployable --独立部署- bare minimum of centralized management of these services --基于分布式管理
官方定义:微服务就是由一系列围绕自己业务开发的微小服务构成,他们独立部署运行在自己的进程里,基于分布式的管理
通俗定义:微服务是一种架构,这种架构是将单个的整体应用程序分割成更小的项目关联的独立的服务。一个服务通常实现一组独立的特性或功能,包含自己的业务逻辑和适配器。各个微服务之间的关联通过暴露api来实现。这些独立的微服务不需要部署在同一个虚拟机,同一个系统和同一个应用服务器中。
2. 为什么是微服务?
1
2
3
4
5
6
7
8
# 1.优点 - 将服务拆分成多个单一职责的小的服务,进行单独部署,服务之间通过网络进行通信- 每个服务应该有自己单独的管理团队,高度自治- 服务各自有自己单独的职责,服务之间松耦合,避免因一个模块的问题导致服务崩溃# 2.缺点 - 开发人员要处理分布式系统的复杂性- 多服务运维难度,随着服务的增加,运维的压力也在增大- 服务治理 和 服务监控 关键
架构的演变
1
2
# 1.架构的演变过程 - [单一应用架构] `===>` [垂直应用架构] `===>` [分布式服务架构] `===>` [流动计算架构]||[微服务架构] `===>` [未知]
dubbo官网:http://dubbo.apache.org/zh-cn/docs/user/preface/background.html
1
2
3
4
5
6
7
8
# 1. All in One Application 单一架构 - 起初当网站流量很小时,将所有功能都写在一个应用里面,对整个应用进行部署,以减少部署节点和成本。对于这个架构简化增删改查的工作量的数据访问框架(ORM)是关键。# 2. Vertical Application 垂直架构 - 当访问量逐渐增大,单一应用增加机器带来的加速度越来越小,提升效率的方法之一是将应用拆成互不相干的几个应用,以提升效率。此时,用于加速前端页面开发的Web框架(MVC)是关键。# 3. Distributed Service 分布式服务架构 - 当垂直应用越来越多,应用之间交互不可避免,将核心业务抽取出来,作为独立的服务,逐渐形成稳定的服务中心,使前端应用能更快速的响应多变的市场需求。此时,用于提高业务复用及整合的分布式服务框架(RPC)是关键。# 4. Elastic Computing 流动计算架构即微服务架构 - 当服务越来越多,容量的评估,小服务资源的浪费等问题逐渐显现,此时需增加一个调度中心基于访问压力实时管理集群容量,提高集群利用率。此时,用于提高机器利用率的资源调度和治理中心(SOA)是关键
3. 微服务解决方案 1 2 3 4 5 6 # 1.Dubbo (阿里系) - 初出茅庐:2011年末,阿里巴巴在GitHub上开源了基于Java的分布式服务治理框架Dubbo,之后它成为了国内该类开源项目的佼佼者,许多开发者对其表示青睐。同时,先后有不少公司在实践中基于Dubbo进行分布式系统架构,目前在GitHub上,它的fork、star数均已破万。Dubbo致力于提供高性能和透明化的RPC远程服务调用方案,以及SOA服务治理方案,使得应用可通过高性能RPC实现服务的输出、输入功能和Spring框架无缝集成。Dubbo包含远程通讯、集群容错和自动发现三个核心部分。- 停止维护:从2012年10月23日Dubbo 2.5.3发布后,在Dubbo开源将满一周年之际,阿里基本停止了对Dubbo的主要升级。只在之后的2013年和2014年更新过2次对Dubbo 2.4的维护版本,然后停止了所有维护工作。Dubbo对Srping的支持也停留在了Spring 2.5.6版本上。- 死而复生:多年漫长的等待,随着微服务的火热兴起,在国内外开发者对阿里不再升级维护Dubbo的吐槽声中,阿里终于开始重新对Dubbo的升级和维护工作。在2017年9月7日,阿里发布了Dubbo的2.5.4版本,距离上一个版本2.5.3发布已经接近快5年时间了。在随后的几个月中,阿里Dubbo开发团队以差不多每月一版本的速度开始快速升级迭代,修补了Dubbo老版本多年来存在的诸多bug,并对Spring等组件的支持进行了全面升级。- 2018年1月8日,Dubbo创始人之一梁飞在Dubbo交流群里透露了Dubbo 3.0正在动工的消息。Dubbo 3.0内核与Dubbo 2.0完全不同,但兼容Dubbo 2.0。Dubbo 3.0将以Streaming为内核,不再是Dubbo 时代的RPC,但是RPC会在Dubbo 3.0中变成远程Streaming对接的一种可选形态。从Dubbo新版本的路线规划上可以看出,新版本的Dubbo在原有服务治理的功能基础上,将全面拥抱微服务解决方案。- 结论:当前由于RPC协议、注册中心元数据不匹配等问题,在面临微服务基础框架选型时Dubbo与Spring Cloud是只能二选一,这也是为什么大家总是拿Dubbo和Spring Cloud做对比的原因之一。Dubbo之后会积极寻求适配到Spring Cloud生态,比如作为Spring Cloud的二进制通信方案来发挥Dubbo的性能优势,或者Dubbo通过模块化以及对http的支持适配到Spring Cloud。
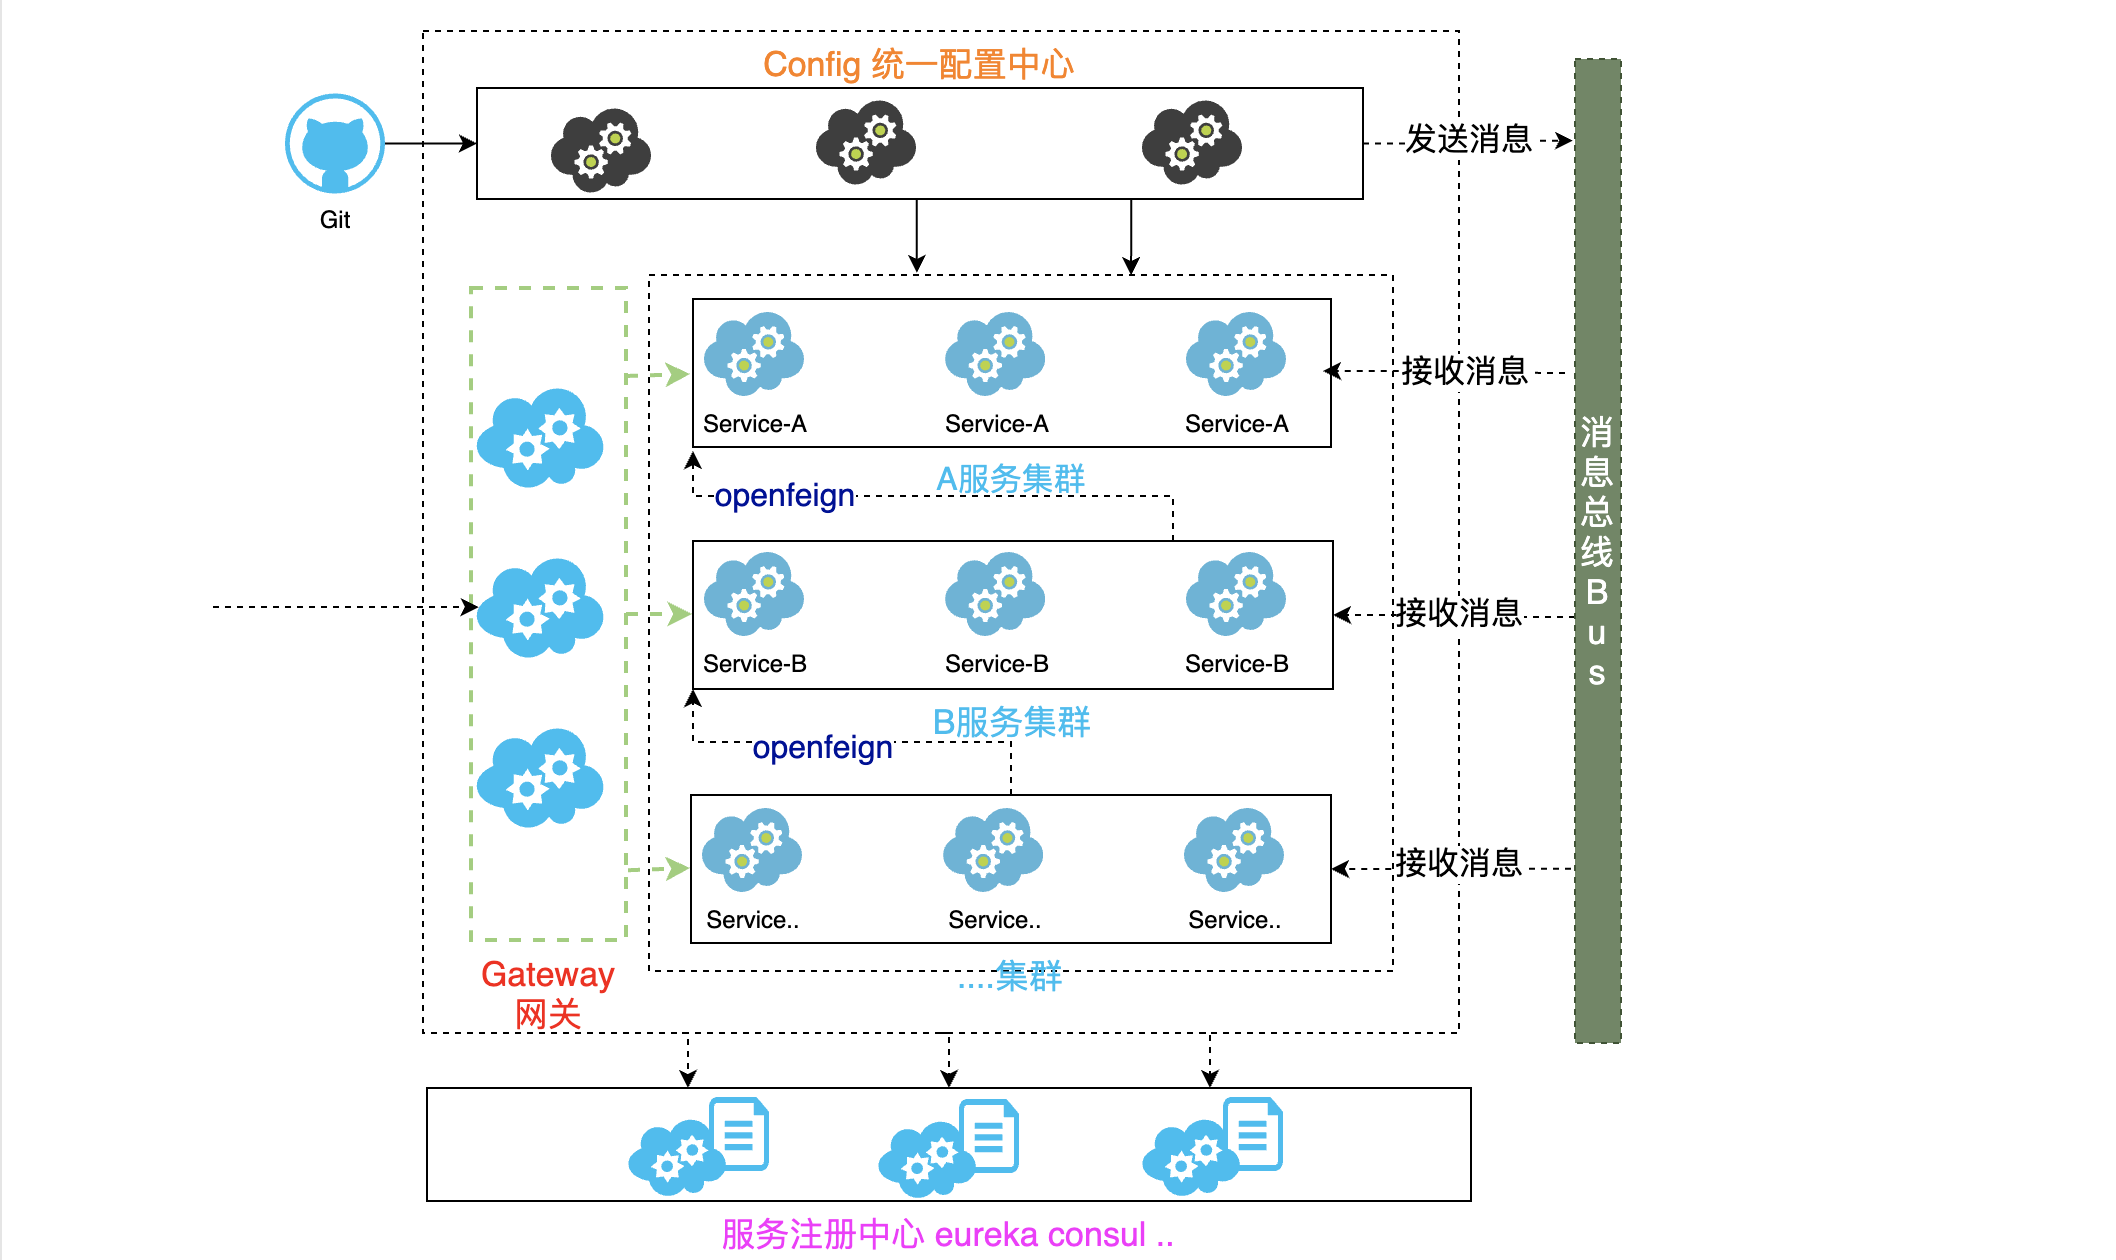
1 2 3 4 5 6 7 8 9 10 11 12 13 14 # Spring Cloud: - Spring Cloud NetFlix(美国 在线视频网站)- Spring Cloud alibaba- Spring Cloud# 核心组件: - eureka、consul、nacos 服务注册中心组件- rabbion & openfeign 服务负载均衡 和 服务调用组件- hystrix & hystrix dashboard 服务断路器 和 服务监控组件- zuul、gateway 服务网关组件- config 统一配置中心组件- bus 消息总线组件
4. 为什么不选择SpringCloud而选用SpringCloudAlibaba? 简单的来说,就是第一套微服务架构解决方案:Spring Boot + Spring Cloud Netflix。最近由于Netflix公司宣布Spring Cloud Netflix 系列技术栈进入维护模式, 于是采用 Spring Cloud Alibaba 方案来替代。
比如Ribbon(负载均衡)、Hystrix(服务熔断和监控)停止维护,而且如config做统一配置中心并不是很方便,于是我们选择Spring Cloud Alibaba。
5. Spring Cloud Alibaba Spring Cloud Alibaba
Spring Cloud Alibaba为分布式应用开发提供了一站式解决方案。它包含了开发分布式应用程序所需的所有组件,使您可以轻松地使用springcloud开发应用程序。
有了Spring Cloud Alibaba,你只需要添加一些注解和少量的配置,就可以将Spring Cloud应用连接到阿里的分布式解决方案上,用阿里中间件搭建一个分布式应用系统。
Spring Cloud Alibaba组件:
服务注册中心 服务配置中心 nacos ===> 替换eureka consul 替换config+bus
服务熔断、流量控制 sentinel(sentinel、sentinel dashBoard)
5. Spring Cloud 整合Alibaba环境搭建 说了这么多,只是想说明下选择Spring Cloud 整合Alibaba的原因,下面正式开始使用IDEA进行环境搭建
五大组件 :
服务注册中心 nacos
服务间通信组件 a.RestTemplate+Ribbon b.OpenFeig 组件
服务熔断、流控 sentinel
网关 gateway
服务配置中心 nacos
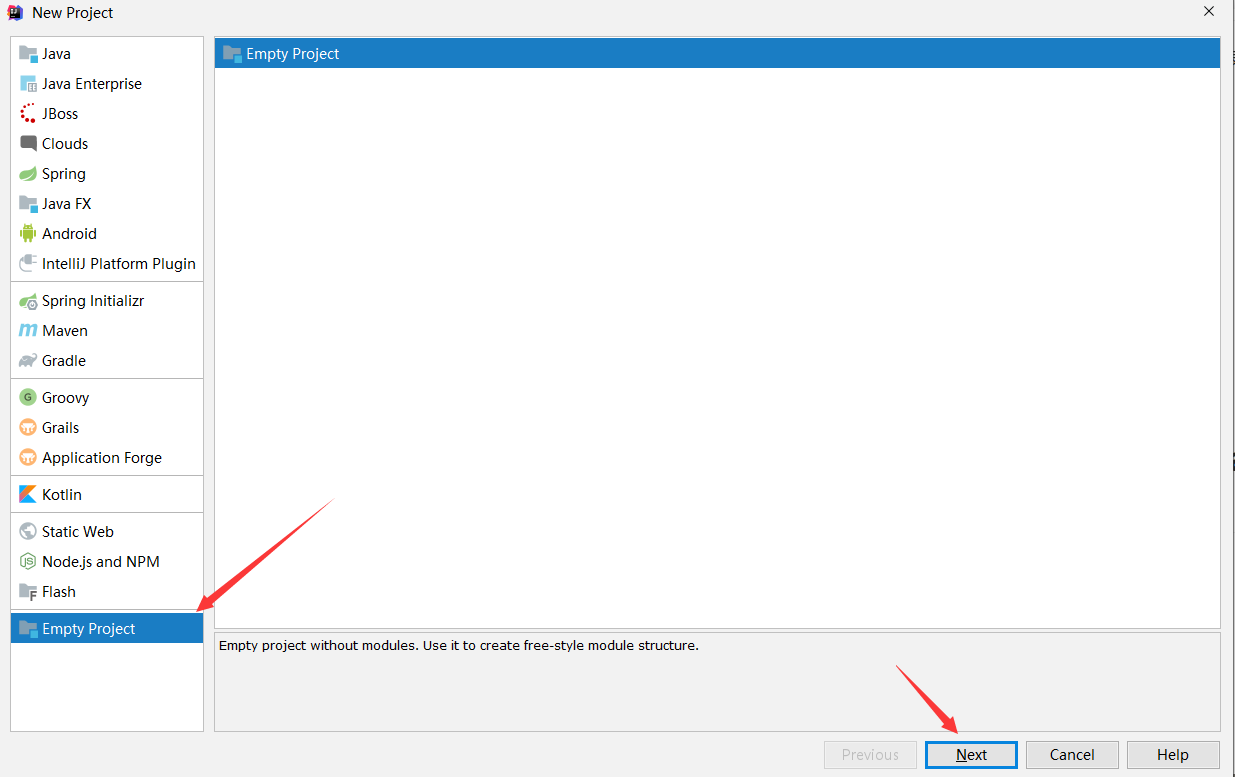
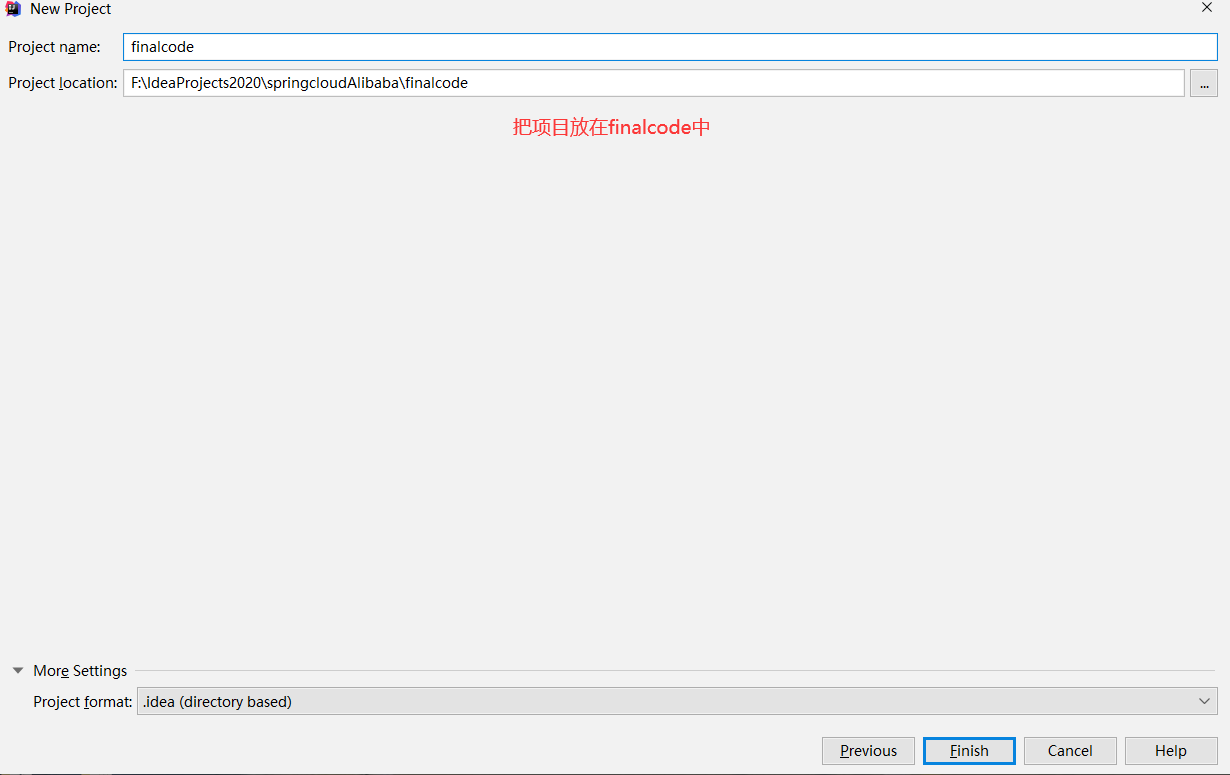
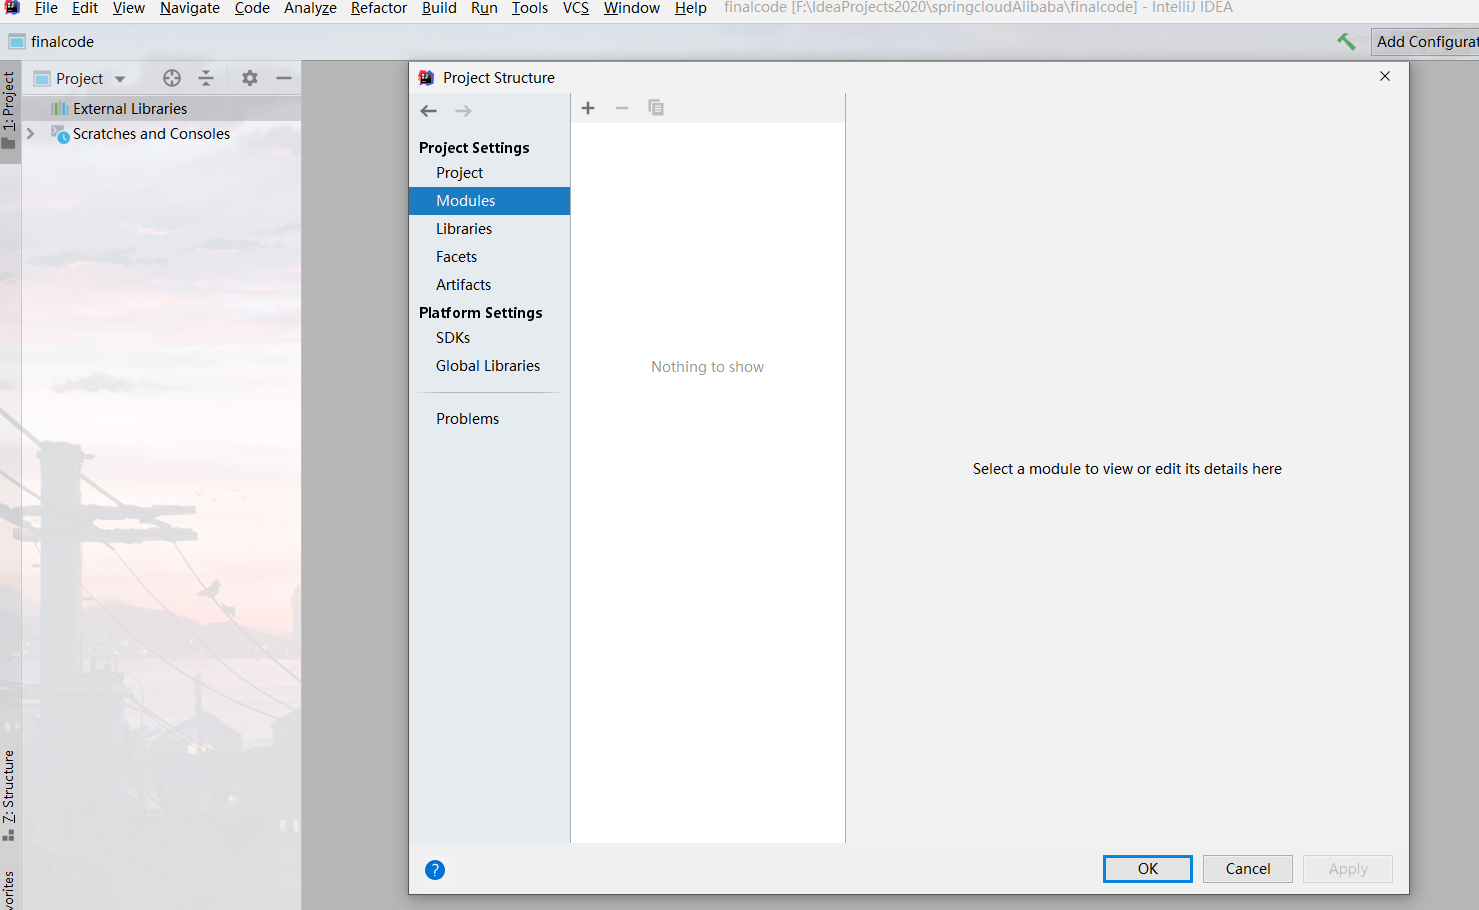
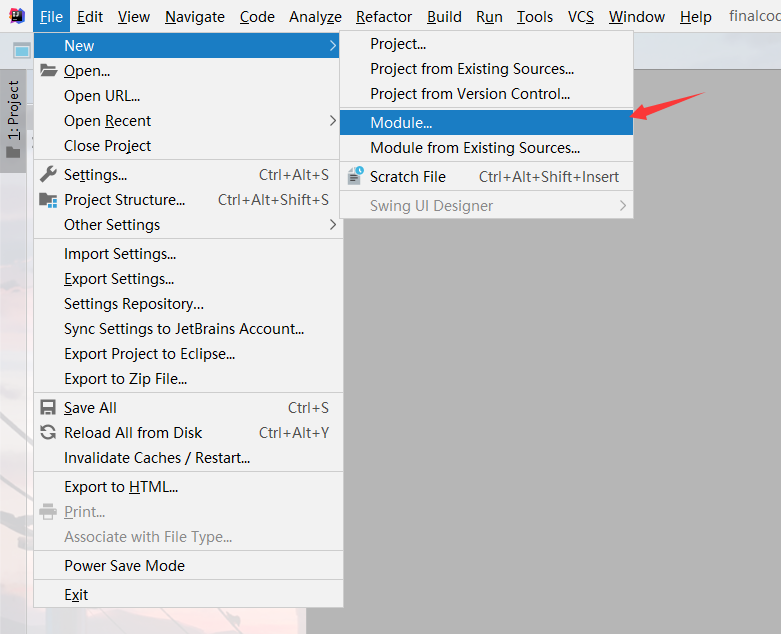
5.1 IDEA新建空模块
因为微服务项目是很多模块的,我们创建这样一个空模块项目是为了方便管理今后开发的模块
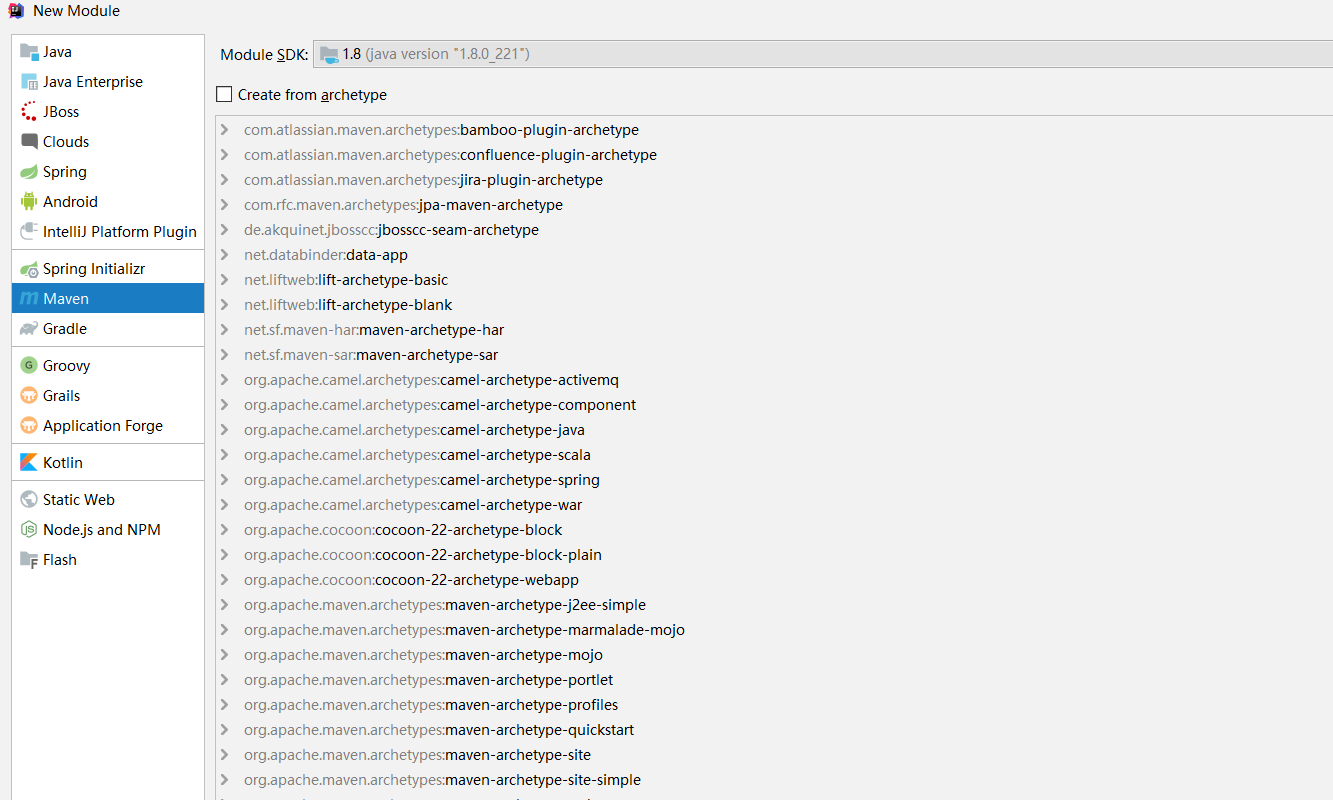
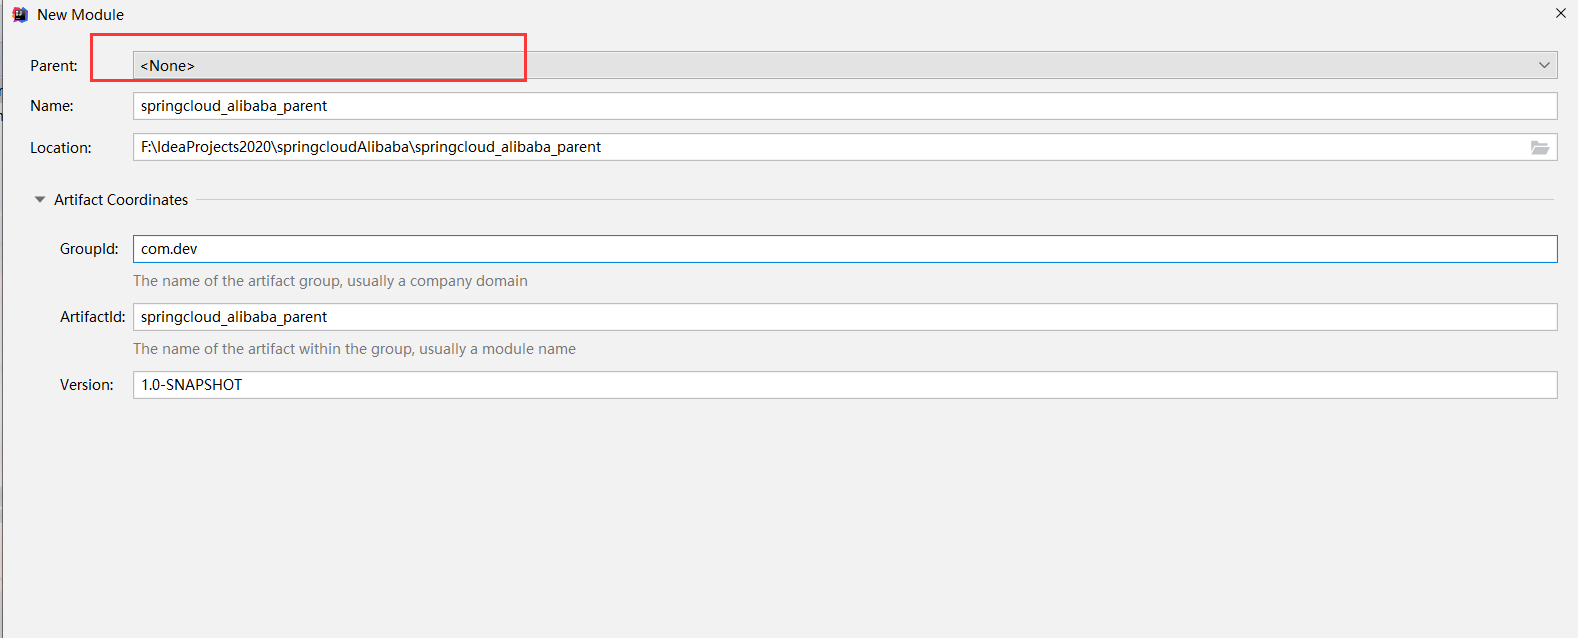
5.2 创建父项目
不要选择这些模板,我们只是新建一个微服务父项目,用作版本控制
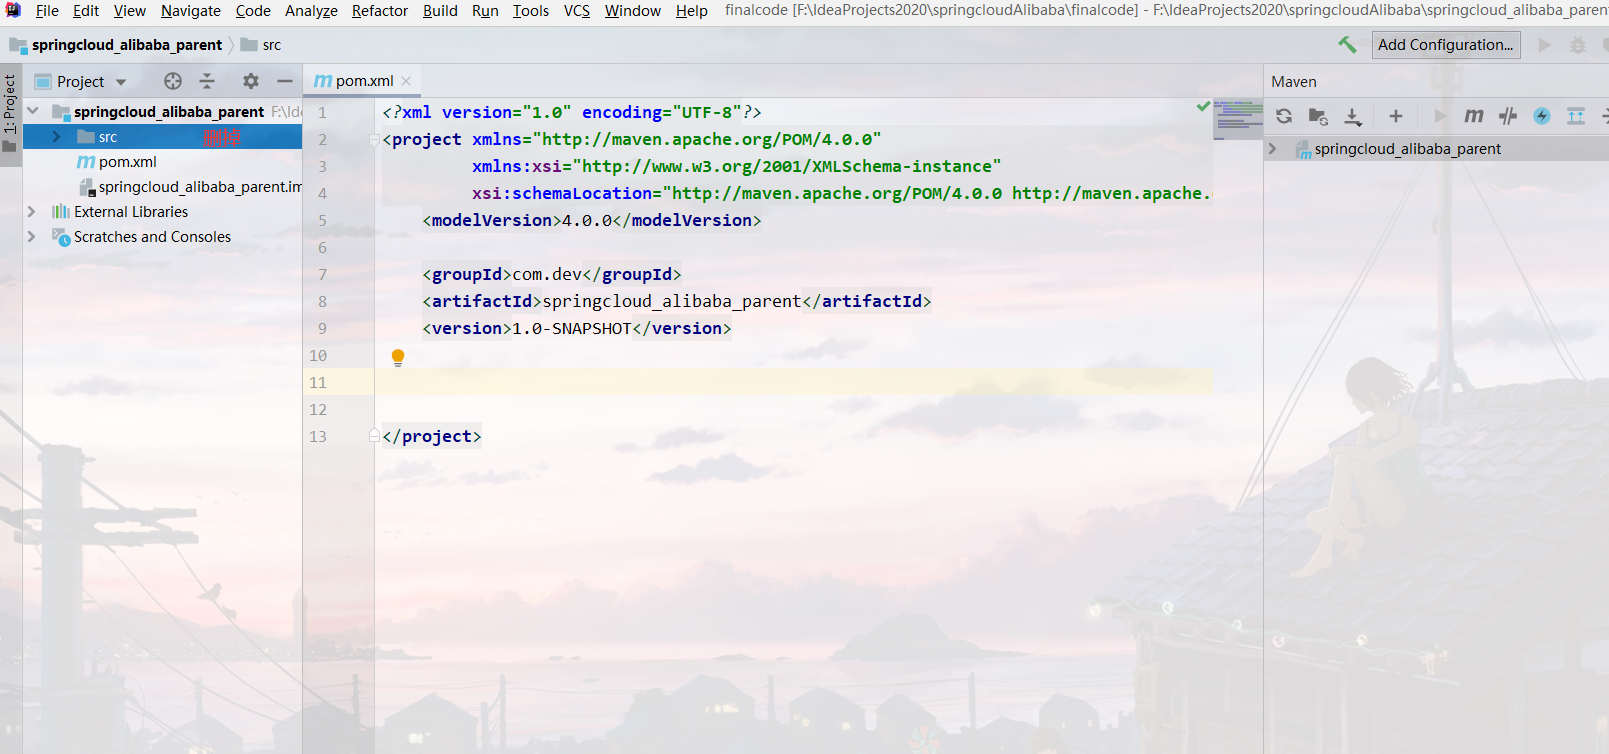
因为整合的是SpringCloud和SpringCloud Alibaba,需要两者的依赖都加入,下面是父项目的pom.xml
1 2 3 4 5 6 7 8 9 10 11 12 13 14 15 16 17 18 19 20 21 22 23 24 25 26 27 28 29 30 31 32 33 34 35 36 37 38 39 40 41 42 43 <?xml version="1.0" encoding="UTF-8" ?> <project xmlns ="http://maven.apache.org/POM/4.0.0" xmlns:xsi ="http://www.w3.org/2001/XMLSchema-instance" xsi:schemaLocation ="http://maven.apache.org/POM/4.0.0 http://maven.apache.org/xsd/maven-4.0.0.xsd" ><modelVersion > 4.0.0</modelVersion > <groupId > com.dev</groupId > <artifactId > springcloud\_alibaba\_parent</artifactId > <packaging > pom</packaging > <version > 1.0-SNAPSHOT</version > <modules > <module > springcloud\_alibaba\_commons</module > <module > springcloud\_alibaba\_users</module > <module > springcloud\_alibaba\_products</module > <module > springcloud\_alibaba\_gateway</module > </modules > <parent > <groupId > org.springframework.boot</groupId > <artifactId > spring-boot-starter-parent</artifactId > <version > 2.2.5.RELEASE</version > </parent > <properties > <spring.cloud.version > Hoxton.SR6</spring.cloud.version > <spring.cloud.alibaba.version > 2.2.1.RELEASE</spring.cloud.alibaba.version > </properties > <dependencyManagement > <dependencies > <dependency > <groupId > org.springframework.cloud</groupId > <artifactId > spring-cloud-dependencies</artifactId > <version > ${spring.cloud.version}</version > <type > pom</type > <scope > import</scope > </dependency > <dependency > <groupId > com.alibaba.cloud</groupId > <artifactId > spring-cloud-alibaba-dependencies</artifactId > <version > ${spring.cloud.alibaba.version}</version > <type > pom</type > <scope > import</scope > </dependency > </dependencies > </dependencyManagement > </project >
SpringCloud选择的是H版本,SpringBoot是2.x,SpringCloudAlibaba是2.2.1
后面的项目都需要继承这个父项目,比如都会用到SpringBoot,那么子项目是不需要写版本号的,由父项目统一管理。
5.3 服务注册中心 Nacos是微服务架构中服务注册中心以及统一配置中心,用来替换原来的(eureka,consul)以及config组件
安装Nacos,这里我们使用Docker安装,具体操作就不细讲,安装完成后,可以在浏览器访问Nacos的web界面,我这里装的是1.3.1
Nacos作为服务注册中心,我们今后只需要把开发的微服务模块注册到它上去即可,这里我们新建用户功能模块和商品模块去注册到Nacos上
pom.xml
1 2 3 4 5 6 7 8 9 10 11 12 13 <dependency > <groupId > org.springframework.boot</groupId > <artifactId > spring-boot-starter-web</artifactId > </dependency > <dependency > <groupId > com.alibaba.cloud</groupId > <artifactId > spring-cloud-starter-alibaba-nacos-discovery</artifactId > </dependency > <dependency > <groupId > com.alibaba.cloud</groupId > <artifactId > spring-cloud-starter-alibaba-nacos-config</artifactId > </dependency >
本质上还是一个SpringBoot项目,所以引入web启动器和nacos发服务注册和配置依赖
下面需要把SpringBoot项目结构完善,新建application.properties和启动类
application.properties
1 2 3 4 5 6 server.port =8888 spring.application.name =USERS spring.cloud.nacos.server-addr =118.195.164.41:8849
可以看到USERS服务已经成功注册到Nacos中
为了测试程序是否成功,我们可以写个测试的接口,来验证
下面同样的操作新建一个Products,这里就不再说明
5.4 服务间通信 服务间通信,SpringCloud Alibaba并没有提供新的组件,所以我们有两种方法实现服务间通信:
1.RestTemplate+Ribbon 使用RestTemplate做接口间的通信,Ribbon实现负载均衡
pom.xml
1 2 3 4 <dependency > <groupId > org.springframework.cloud</groupId > <artifactId > spring-cloud-starter-openfeign</artifactId > </dependency >
1.RestTemplate的基本使用
1
2
RestTemplate restTemplate = new RestTemplate ();String orderObject = restTemplate.getForObject("http://localhost:9999/order" , String.class);
2.使用ribbon组件+restTemplate实现负载均衡
1.discoveryClient
1
2
3
4
5
LoadBalanceClient List<ServiceInstance> serviceInstances = discoveryClient.getInstances("ORDERS" );"服务主机:{} 服务端口:{} 服务地址:{}" ,serviceInstance.getHost(),serviceInstance.getPort(),serviceInstance.getUri());String result = new RestTemplate ().getForObject(serviceInstances.get(0 ).getUri() + "/order" , String.class);
loadBalancerClient
1
2
3
ServiceInstance serviceInstance = loadBalancerClient.choose("ORDERS" );"服务主机:{} 服务端口:{} 服务地址:{}" ,serviceInstance.getHost(),serviceInstance.getPort(),serviceInstance.getUri());String result = new RestTemplate ().getForObject(serviceInstance.getUri() + "/order" , String.class);
综上是RestTemplate+Ribbon做服务间通信,并且可以实现负载均衡(默认轮询),保证高可用,但是依旧会出现请求地址写死 的情况,所以我们最终采用Openfeign做服务间的通信
首先要知道,Openfeign是一个伪http请求类,它底层还是RestTemplate,支持SpringMVC注解,也就是说我们可以把它当作是一个controller的接口类来写,SpringMVC注解完全支持!
我们需要新建一个包,来存放服务的调用接口
1 2 3 4 5 6 7 8 9 10 /\*\*@author 路飞@create 2021 /6 /25 8 :53 @FeignClient("PRODUCTS") public interface ProductsClients {@GetMapping("/product") product () ;
调用我们只需要在controller中注入ProductsClients,调用这个product()方法即可
1 String result = productsClients.product();
默认轮询实现负载均衡~
5.5 网关服务 1 2 3 4 5 6 7 8 # 1.说明 - 网关统一服务入口,可方便实现对平台众多服务接口进行管控,对访问服务的身份认证、防报文重放与防数据篡改、功能调用的业务鉴权、响应数据的脱敏、流量与并发控制,甚至基于API调用的计量或者计费等等。- 网关 = 路由转发 + 过滤器# 2.为什么需要网关 - 1.网关可以实现服务的统一管理- 2.网关可以解决微服务中通用代码的冗余问题(如权限控制,流量监控,限流等)
SpringCloud Alibaba并没开发新的网关组件,而且Gateway已经很优秀,这里我们采用Gateway做服务器的网关,下面开发网关服务:
pom.xml
1 2 3 4 5 6 7 8 9 10 11 12 13 14 <dependency > <groupId > com.alibaba.cloud</groupId > <artifactId > spring-cloud-starter-alibaba-nacos-discovery</artifactId > </dependency > <dependency > <groupId > org.springframework.cloud</groupId > <artifactId > spring-cloud-starter-gateway</artifactId > </dependency > <dependency > <groupId > com.alibaba.cloud</groupId > <artifactId > spring-cloud-starter-alibaba-nacos-config</artifactId > </dependency >
**注意:**这里不用加入web启动启动器,Gateway为了效率使用webflux进行异步非阻塞模型的实现,因此和原来的web包冲突,去掉原来的web即可
网关的配置可以用配置文件实现,也可以用Java代码
配置文件建议使用yml,因为格式要求高,方便查看,不容易错,同样注册到Nacos上
下面的路由配置实现了服务接口的统一入口端口是8990,当访问路径是是/invoke,就转发到USERS服务下,当访问路径是/product,就转发到PRODUCTS,使用lb://服务名称就可以实现负载均衡
1 2 3 4 5 6 7 8 9 10 11 12 13 14 15 16 17 18 19 server: port: 8990 spring: application: name: GATEWAY cloud: nacos: discovery: server-addr: 118.195 .164 .41 :8849 gateway: routes: - id: users\_route uri: lb://USERS predicates: - Path=/invoke - id: products\_route uri: lb://PRODUCTS predicates: - Path=/product
java代码配置路由
1 2 3 4 5 6 7 8 9 10 @Configuration public class GatewayConfig {@Bean public RouteLocator customRouteLocator (RouteLocatorBuilder builder) {return builder.routes()"order\_route" , r -> r.path("/product" )"http://localhost:9997/" ))
但我依旧强烈建议使用yaml,后面把配置文件放在Nacos想改也很方便
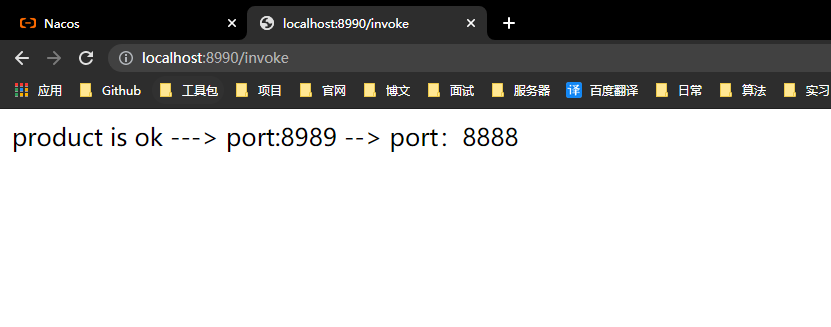
验证成功
5.6 服务配置中心 Nacos不仅仅可以做服务的注册中心,还可以做服务的配置中心,可以把微服务的配置文件交给远端管理,操作也很简单
添加依赖
1 2 3 4 5 <dependency > <groupId > com.alibaba.cloud</groupId > <artifactId > spring-cloud-starter-alibaba-nacos-config</artifactId > </dependency >
首先需要了解下Nacos的命名空间,组的概念,Nocas提供了默认的公共的命名空间和组,但作为具体系统开发,需要命名分类,方便管理,类比数据库,命名空间相当于库的概念,一个项目基本上就一个命名空间,下面可以有很多组,就类型数据表,每个微服务就可以有一个组
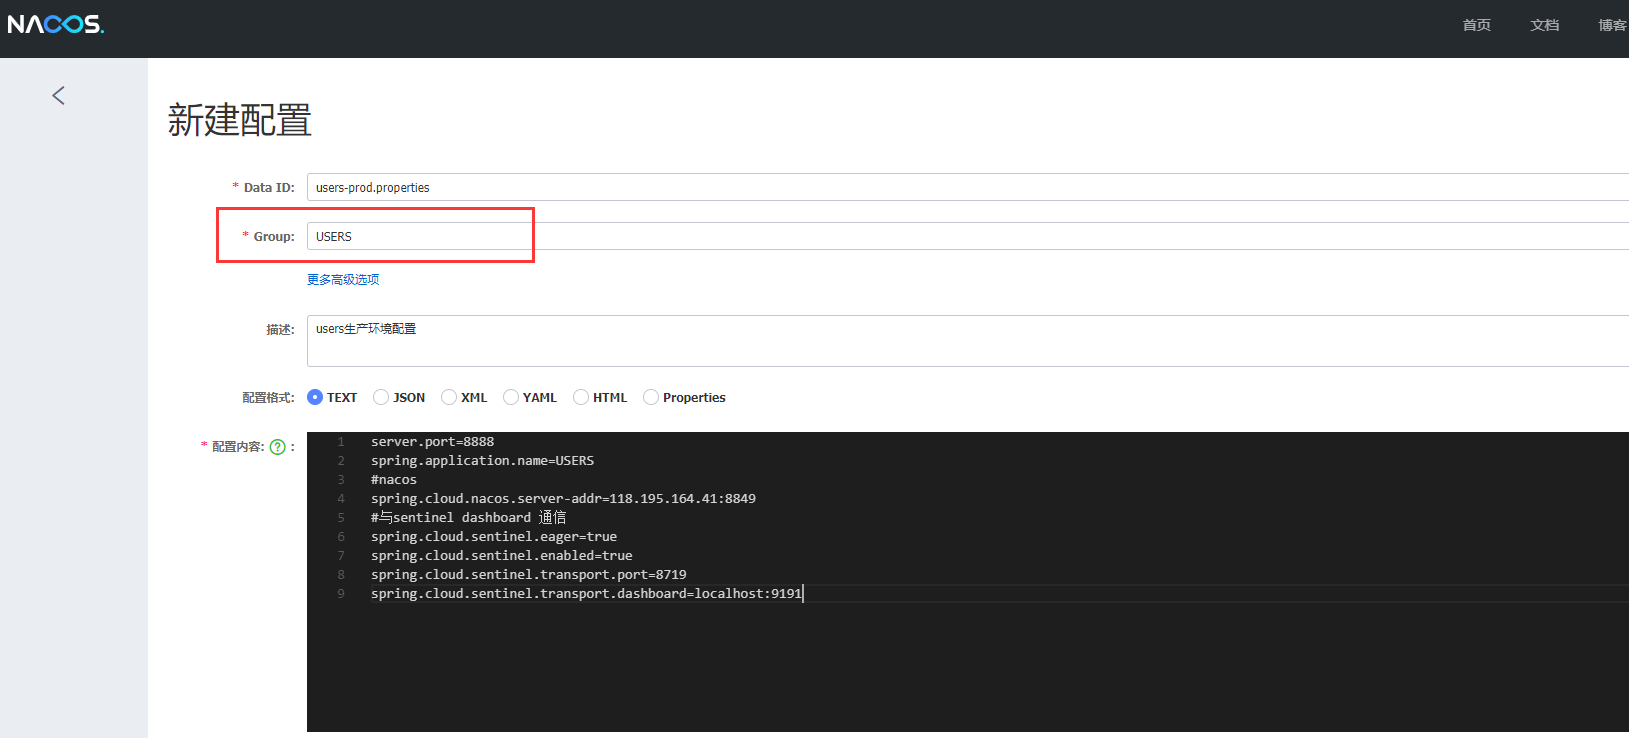
通过Nacos Dashboard界面,我们新建final命名空间和几个组做测试
product的配置文件一样,就是把本地的配置文件交给远端管理了
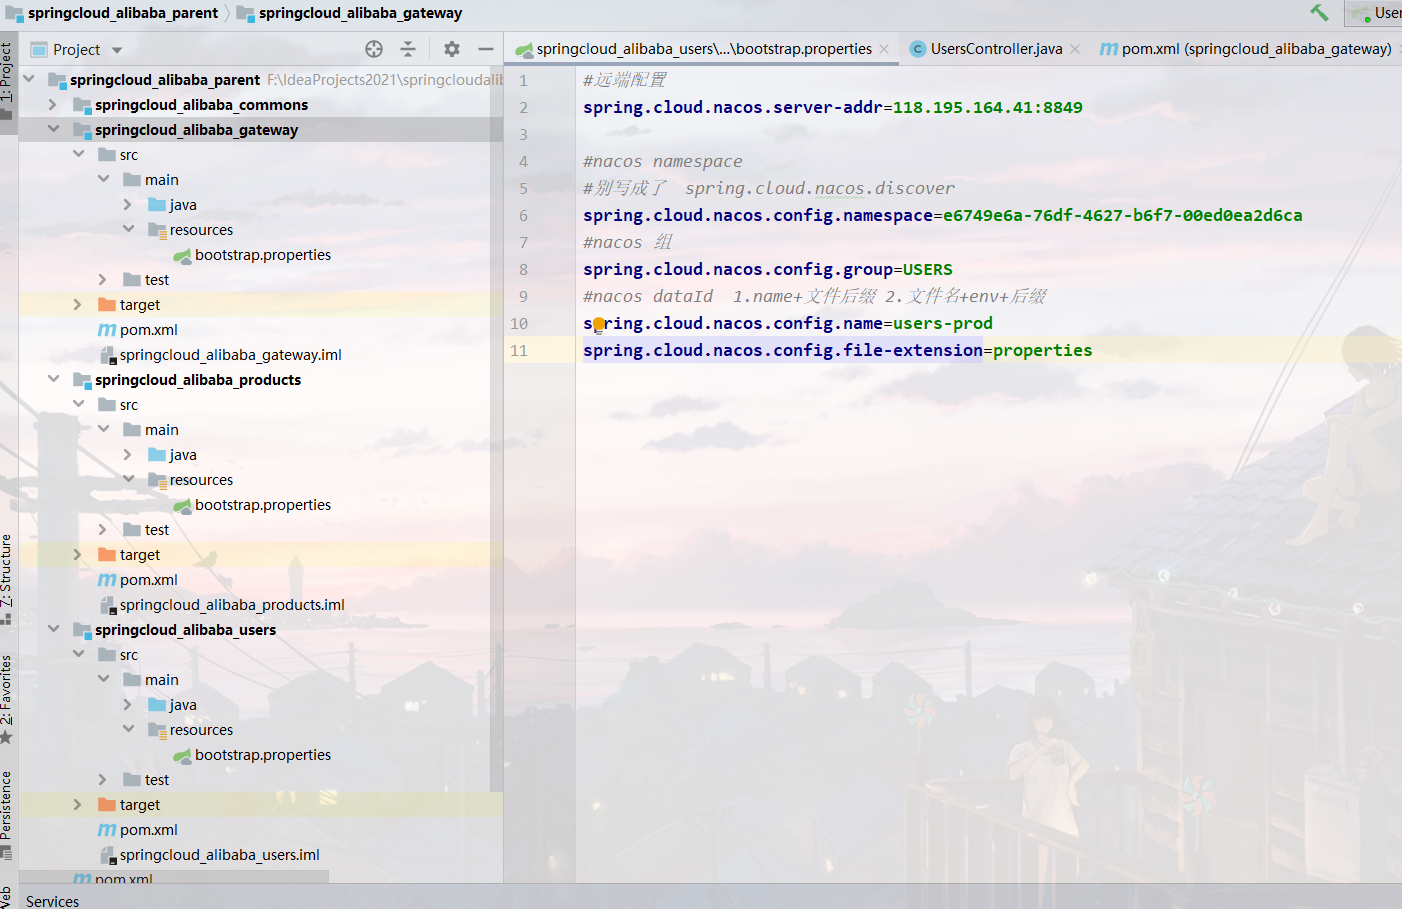
保存后,假如就这样直接启动肯定是不行的,因为本地只是添加了依赖,并没有告知程序去哪里拉取配置,所以需要创建bootstrap.properties(不能是application.properties,配置文件拉取要早于程序,bootstrap是早于application的)
1 2 3 4 5 6 7 8 9 10 spring.cloud.nacos.server-addr =118.195.164.41:8849 spring.cloud.nacos.config.namespace =e6749e6a-76df-4627-b6f7-00ed0ea2d6ca spring.cloud.nacos.config.group =USERS spring.cloud.nacos.config.name =users-prod spring.cloud.nacos.config.file-extension =properties
同样Productes,Gateway服务也是这样修改的,注意文件相对应就行
好了就这样,我们看看最后的项目目录:
测试也通过,服务配置完成!
5.7服务熔断和流控 随着微服务的普及,服务调用的稳定性变得越来越重要。Sentinel以“流量”为突破口,在流量控制、断路、负载保护等多个领域进行工作,保障服务可靠性。
通俗:用来在微服务系统中保护微服务对的作用 如何 服务雪崩 服务熔断 服务降级 就是用来替换hystrix
这里我们也只能简单的模拟下,服务的熔断和流控是技术难点
sentinel提供了两个服务组件:
1 2 一个是 sentinel 用来实现微服务系统中服务熔断、降级等功能。这点和hystrix 类似
安装下sentinel dashboard
去Github下载sentinel的jar包,它是SpringBoot应用,默认端口是8080,但一般机器的8080都是有其它服务的,所以需要运行时用java -jar -Dserver.port=自定义端口号 sentinel.jar来实现指定端口启动
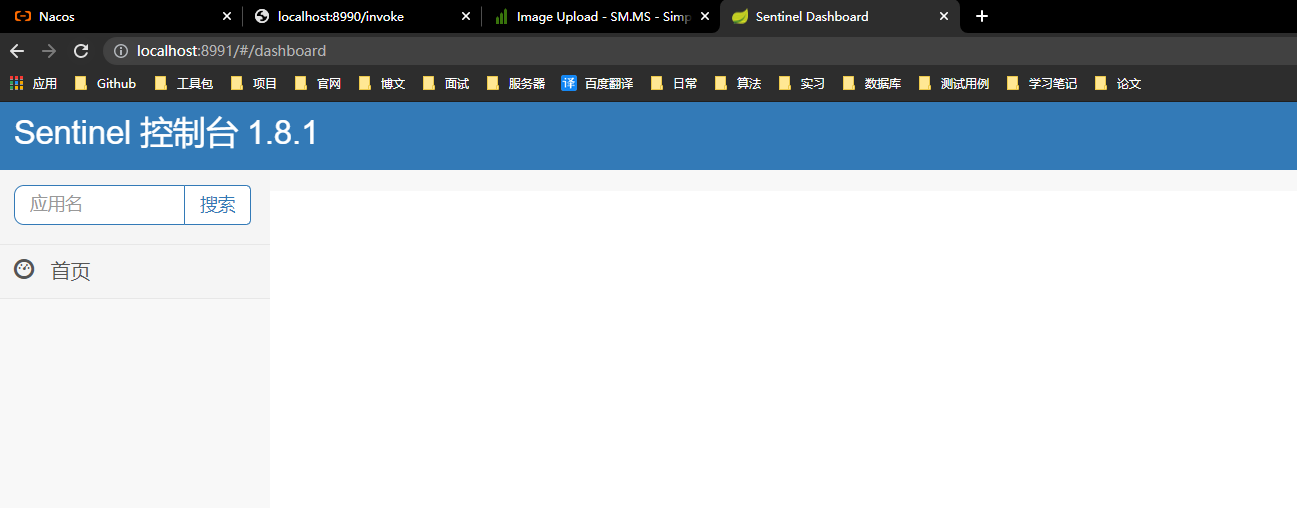
启动成功后,访问sentinel的web页面,默认用户名密码都sentinel
目前是项目没有集成sentinel,所以它是没有选项的,现在我们做个测试,在USERS中的接口加个参数判断,小于0就抛异常,来触发sentinel的熔断机制
添加依赖
1 2 3 4 <dependency > <groupId > com.alibaba.cloud</groupId > <artifactId > spring-cloud-starter-alibaba-sentinel</artifactId > </dependency >
因为我们已经把配置文件交给Nocas管理,所以只需要在远端的配置文件加入几行配置即可
1 2 3 4 5 6 spring.cloud.sentinel.enabled =true spring.cloud.sentinel.transport.dashboard =localhost:8991 spring.cloud.sentinel.transport.port =8719
我们稍微修改下USERS中的接口方法
1 2 3 4 5 6 7 8 9 10 11 12 13 14 15 16 17 18 19 20 21 22 23 24 25 26 27 28 29 30 31 32 33 34 35 36 37 38 39 40 41 /\*\*
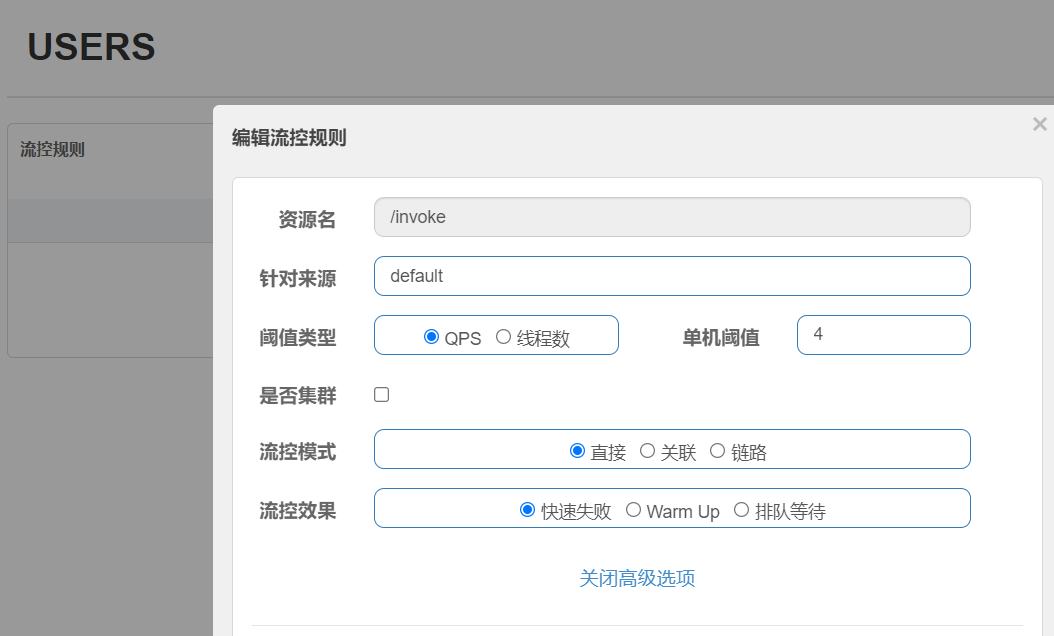
在Sentinel Dashboard中加入流量控制规则,当QPS达到4就触发流控
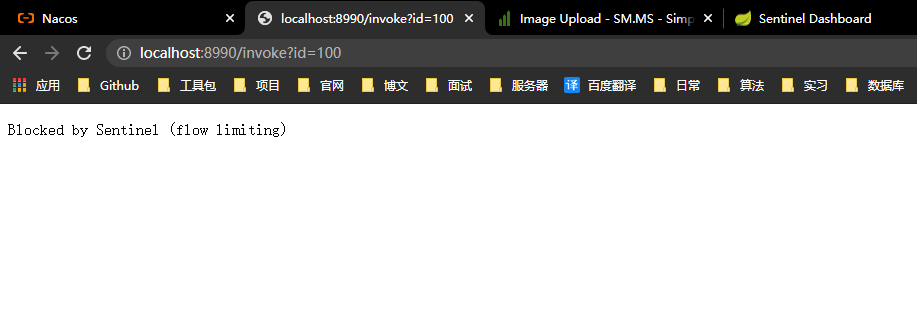
测试结果,当我们请求过快,达到阈值就会进行流控,无法请求
当我们请求所带的id小于0也会走失败的处理方法,而不会抛出异常
到此,五大组件的集成环境已经搭建完成!
6. 总结 回过去看一看,虽然组件很多,但搭建并不难,基本的步骤就是:
加依赖
写配置
写注解
微服务开发难得的后面的模块一旦多起来,模块之间的调用就很饶人了
7.参考 小陈的2021年最新SpringCloud微服务实战教程
8.源码


